Quick Answer
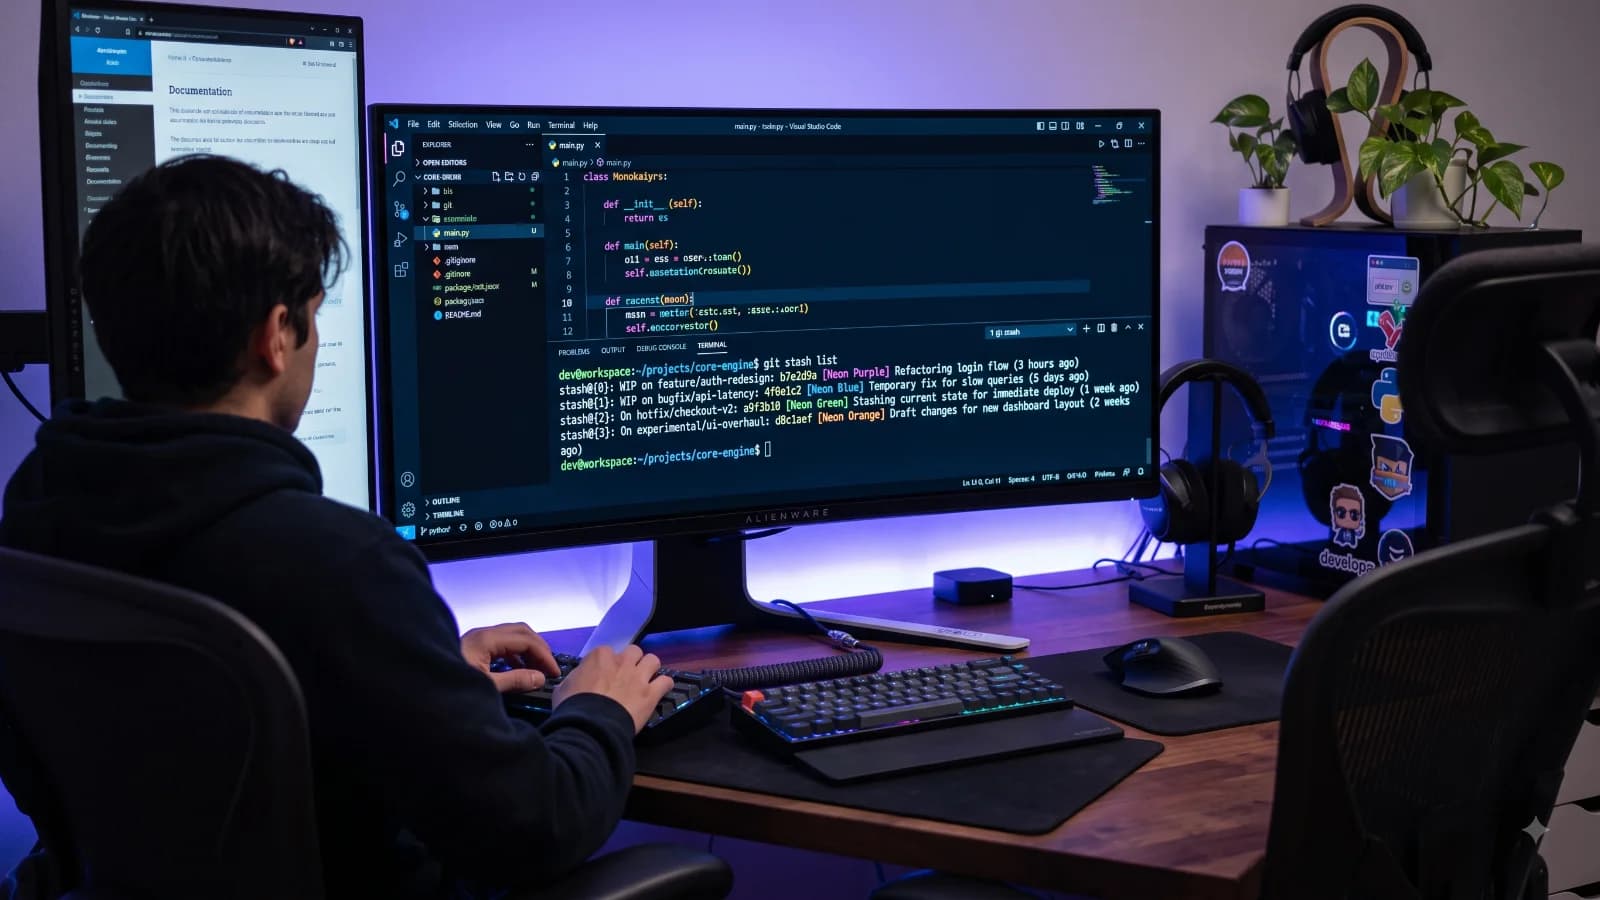
Working with a fast-paced version control system often means needing to abruptly switch tasks in the middle of a feature implementation. When your current working directory contains uncommitted modifications that you are not yet ready to commit, Git stashing comes to the rescue. The stashing mechanism allows you to save your modified tracked files, stage changes, and untracked files temporarily onto a stack, giving you a clean working directory to switch branches, pull updates, or investigate bug reports. Once your urgent task is complete and you return to your original branch, you need a reliable way to bring those saved modifications back into your workspace. This is where the stash pop operation enters your daily developer toolkit, serving as a direct and efficient bridge between your temporary storage stack and your active development workspace. Understanding how to execute this command properly ensures you can seamlessly resume your coding flow without cluttering your repository with unnecessary commits or leaving behind orphaned stash references that waste system space.
Introduction to Git Stash Pop
Every developer has experienced the friction of being deep into coding a complex feature when an urgent production bug demands immediate attention on another branch. You cannot commit your half-finished, broken code because it violates repository standards, yet you cannot switch branches without either losing your changes or committing them prematurely. Git stashing solves this exact dilemma by taking a snapshot of your modified tracked files and stowing them away safely in a local stack. When you are ready to resume your work, bringing those saved modifications back into your active working directory is the primary purpose of the pop command. Unlike manual file backups or temporary commits, this approach integrates directly into your version control workflow, allowing you to transition between tasks smoothly. By leveraging this technique, you can maintain pristine working trees across multiple branches while preserving every line of experimental code until you are ready to integrate it fully into your project.
What is Git Stash Pop?
At its core, git stash pop is a composite command designed to retrieve the most recently saved changes from your stash stack and apply them directly to your current working directory while simultaneously removing that stash entry from the internal stack. This differentiates it conceptually from creating regular commits, which permanently record history into your branch log, and from standard application commands that leave the stash intact. When you execute this command, Git reads the top entry of your stash stack, attempts to merge those changes into your current files, and then deletes the reference if the application succeeds. This dual action of applying and dropping saves you from executing separate cleanup commands, making your daily routine more streamlined. However, because it removes the stash entry immediately upon application, it requires a clear understanding of your working state to prevent accidental data loss if unexpected merge conflicts arise during the reapplication process.
How Git Stash Pop Works Under the Hood
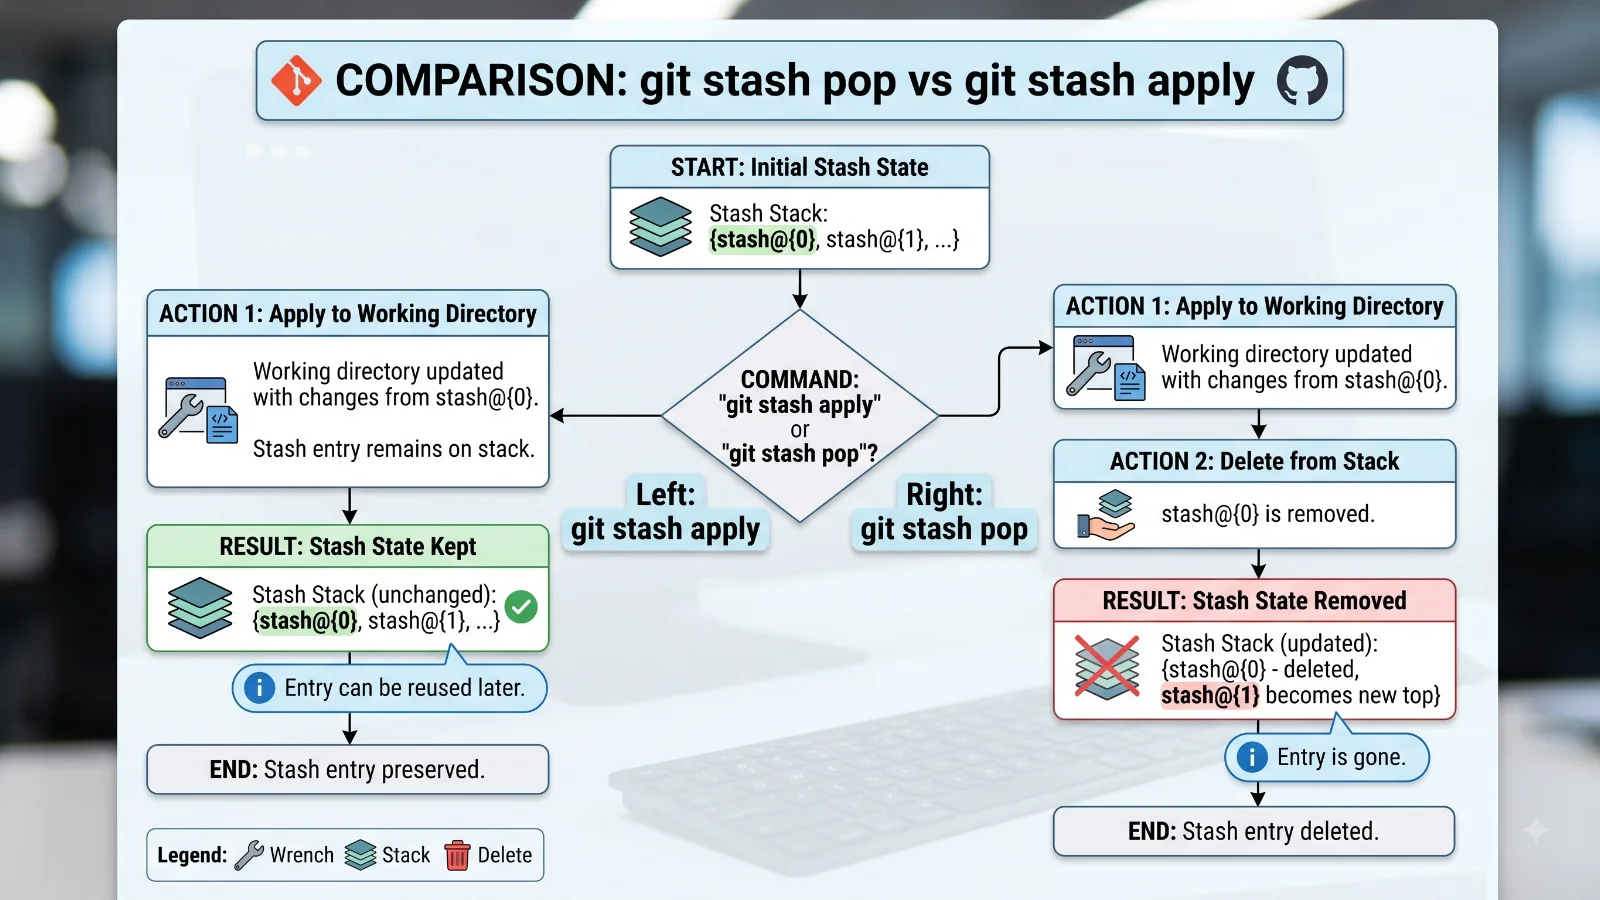
To truly master this operation, it helps to understand the underlying mechanics of how Git manages your stashed changes. Git stores stashes as commit objects within your local repository database, organized in a LIFO data structure known as the stash stack. The most recent stash is labeled as stash@{0}, with older entries incrementing their index numbers accordingly. When you invoke the pop operation, Git performs two distinct actions sequentially under the hood. First, it extracts the commit representation of stash@{0} and attempts to merge its file modifications into your current working tree using standard merge algorithms. Second, assuming this merge completes without blocking conflicts, Git updates the reference logs to remove that specific stash entry, effectively shifting all remaining stashes down one position in the stack. If conflicts occur during the merge phase, Git halts the second step, preserving your stash entry so you do not lose your saved work while you resolve the discrepancies manually.
Key Components: Stash Pop vs. Stash Apply
A common point of confusion for developers new to advanced Git workflows involves choosing between git stash pop and git stash apply. While both commands retrieve your saved modifications from the stash stack, their handling of the stash entry itself is fundamentally different. The apply command simply copies the changes from the specified stash into your working directory, leaving the original stash intact on the stack for future use. Conversely, the pop command applies the changes and immediately deletes the stash entry from the stack in a single automated step. Choosing the correct command depends entirely on your confidence in the current working state and your long-term stash management strategy. If you are experimenting with applying a stash across multiple branches or want a safety net until you verify everything compiles and passes tests, using apply is safer. If you are confident in your environment and want to keep your stash stack clean and free of redundant entries, pop is the more efficient choice.
Step-by-Step Example of Using Git Stash Pop
To see this operation in action, let us walk through a practical terminal workflow demonstrating how to create, pop, and verify stashed modifications in a typical project. Imagine you are working on a configuration file and need to switch branches quickly.
echo "server_port=8080" >> config.txt
git status
git stash
At this point, your working directory is clean, and your changes are safely stored at the top of the stack. You can switch branches, perform your necessary tasks, and return to your original branch. Once back, you execute the retrieval command:
git stash pop
Git takes the modifications from the top of the stack, writes them back into config.txt, and removes the entry from the stack. You can verify the success of this operation by running git status to ensure your files are modified and ready for staging, and git stash list to confirm that your stash stack is now empty or contains only your older entries.
Benefits of Using Git Stash Pop
Utilizing this command effectively yields several distinct productivity and organizational benefits for software development teams. First and foremost, it eliminates unnecessary manual cleanup steps by combining the application and deletion phases into a single atomic action, saving valuable keystrokes throughout the workday. Second, it helps maintain a tidy stash stack. Developers who rely solely on apply often accumulate dozens of obsolete stash entries, making it difficult to locate specific historical modifications when needed. By automatically dropping successfully applied stashes, the pop command encourages a clean, minimalist approach to temporary storage. Additionally, it enforces good context-switching habits, allowing developers to jump between feature branches, hotfix branches, and experimental tests without polluting their commit history with dozens of WIP commits that require tedious interactive rebasing later.
Limitations and Handling Conflicts
See also: merge conflicts
While the pop command is exceptionally powerful, it is not immune to complications, particularly when dealing with concurrent changes across different branches. If you have modified the same files in your working directory or on your new branch that were present in your stash, Git may encounter merge conflicts during the reapplication phase. When this happens, Git pauses the operation, marks the conflicting files with standard conflict markers, and halts the process. Crucially, because conflicts prevented a clean merge, Git does not drop the stash entry from the stack; your saved modifications remain safely preserved at stash@{0}. This safety feature ensures you never lose work due to a failed merge. To resolve the issue, you must open the conflicting files, manually edit the code to resolve the differences, stage the resolved files using git add, and then manually drop the stash using git stash drop once you are satisfied with the resolution.
Frequently Asked Questions
Developers frequently encounter specific edge cases when managing stashes in large codebases. Understanding these common troubleshooting scenarios helps prevent accidental data loss and streamlines your workflow.
What is the difference between git stash pop and git stash apply? The pop command applies the stashed changes and immediately removes the stash entry from the stack, whereas the apply command copies the changes into your working directory while leaving the stash entry intact for future use.
Does git stash pop delete the stash if there is a conflict? No. If merge conflicts arise during the pop operation, Git preserves the stash entry on the stack so your original modifications are not lost while you resolve the conflicts manually.
How can I undo a git stash pop if something goes wrong? If you popped a stash incorrectly or experienced an unwanted merge, you can examine your reflog using git reflog to find the commit hash of the stash before it was dropped, and then recreate it or check it out directly.
Can I pop a specific stash instead of the most recent one? Yes, you can target a specific stash by supplying its index number, such as git stash pop stash@{2}, though you should be mindful of potential index shifting across the stack.
Conclusion
Mastering git stash pop is an essential milestone for any developer seeking to optimize their Git version control workflow. By combining the retrieval of saved modifications with automatic stack cleanup, this command empowers you to switch contexts rapidly without cluttering your repository history or accumulating obsolete temporary entries. While conflicts can occasionally arise when merging divergent code states, Git's built-in safety mechanisms ensure your work remains secure, leaving your stash intact until conflicts are fully resolved. Integrating this tool thoughtfully into your daily routine fosters a cleaner workspace, reduces cognitive overhead during complex multi-branch tasks, and ultimately contributes to a smoother, more efficient software development lifecycle.
📌 Recommended Next Guides & References
  <li>
    <a href="/article/docker-and-kubernetes-how-they-work-together-2" class="text-primary hover:underline font-semibold flex items-center gap-2">
      <span>→</span> <span>Docker and Kubernetes: How They Work Together</span>
    </a>
  </li>

  <li>
    <a href="/article/kubernetes-ingress-explained" class="text-primary hover:underline font-semibold flex items-center gap-2">
      <span>→</span> <span>Kubernetes Ingress Explained: Routing, Controllers, and TLS</span>
    </a>
  </li>

  <li>
    <a href="/article/kubernetes-ingress-controller-explained" class="text-primary hover:underline font-semibold flex items-center gap-2">
      <span>→</span> <span>Kubernetes Ingress Controller Explained: Architecture, Routing, and Implementation</span>
    </a>
  </li>