Quick Answer
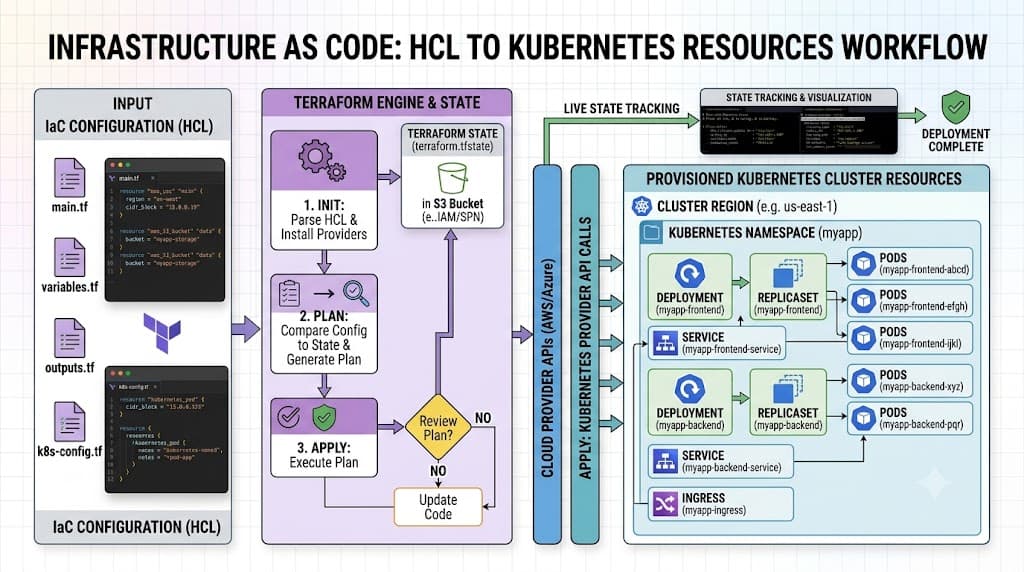
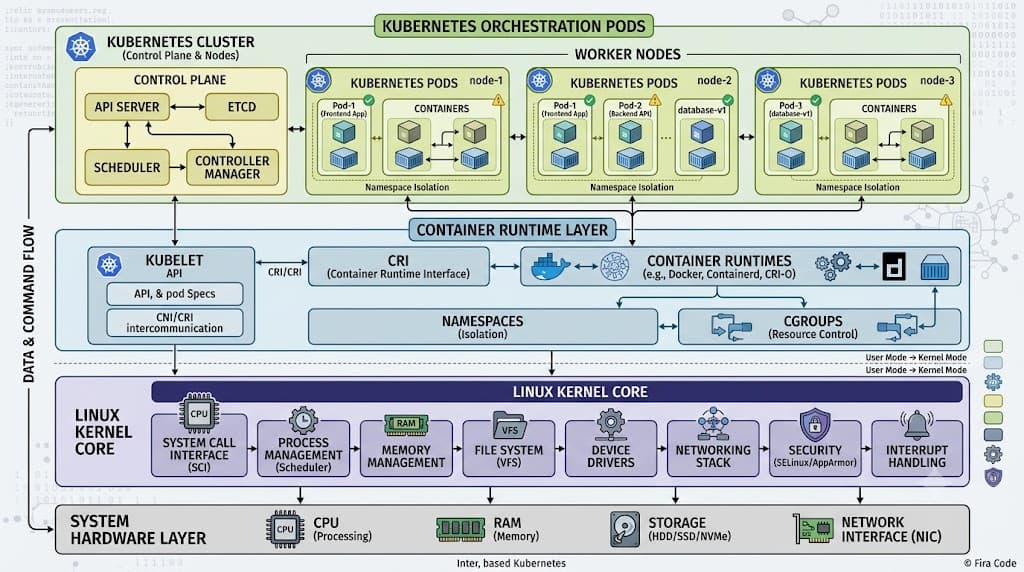
A Kubernetes YAML file is a text-based configuration manifest that defines the desired state of resources running inside your cluster. Instead of managing containers through imperative command-line flags, engineers write declarative declarations specifying what workloads, networks, and storage components should exist. The Kubernetes control plane continuously reconciles the live cluster state with these definitions, ensuring high availability and self-healing operations. Utilizing a kubernetes yaml file ensures that your infrastructure setup is version-controlled, repeatable, and easily shared across development, staging, and production environments. For example, applying a configuration manifest with kubectl apply -f deployment.yaml instructs the API server to create or update the specified application workloads instantly.
Quick Answer
What is a kubernetes yaml file? It is a structured text document written in YAML format that tells the Kubernetes control plane what objects to create, update, or delete. It uses a declarative approach where you define the desired state rather than walking through manual imperative steps. The core workflow relies on saving this manifest locally and executing a tool like kubectl apply to push the configuration to the cluster API server safely.
Kubernetes Manifest Anatomy
Every valid Kubernetes manifest shares a consistent foundational structure composed of top-level keys that instruct the API server on how to parse and handle the object. Understanding the core anatomy of a kubernetes configuration file is essential for avoiding syntax errors and unexpected behavior in your clusters. At the absolute minimum, every manifest requires four core fields: apiVersion, kind, metadata, and spec. The apiVersion field tells Kubernetes which API group and version to use when deserializing the object, ensuring compatibility as APIs evolve across cluster upgrades. The kind field specifies the exact type of object you want to create, such as a Deployment, Service, ConfigMap, or PersistentVolumeClaim. The metadata block contains unique identifying information, including the object's name, an optional namespace, and critical organizational attributes like labels and annotations. Finally, the spec field defines the actual desired behavior, configuration parameters, and container specifications for that specific object. Because YAML relies heavily on whitespace for structural hierarchy, incorrect indentation will immediately cause the API server to reject your manifest during submission.
Deployment YAML Example
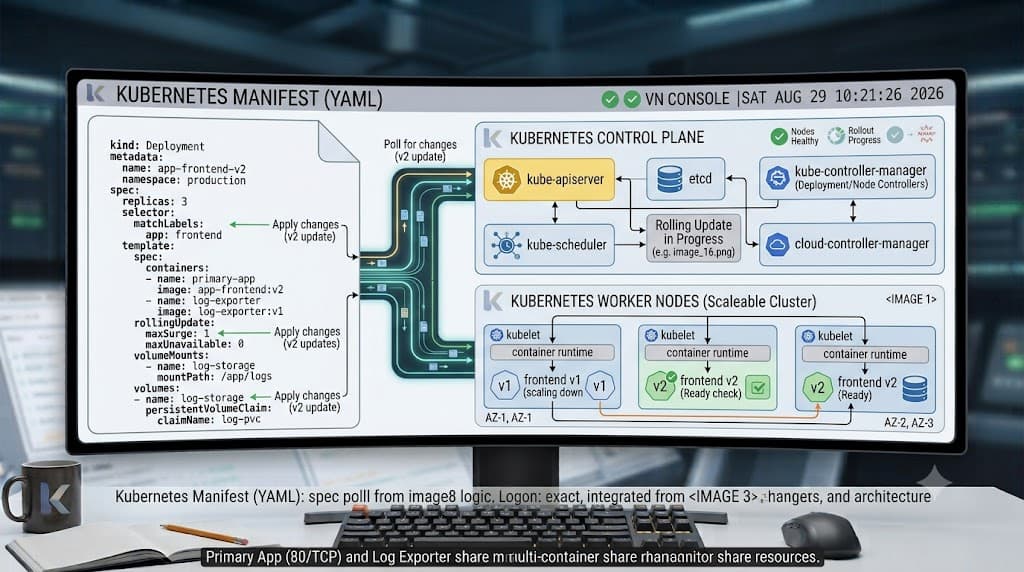
A deployment manages a replicated set of identical pods, ensuring that a specified number of replicas are running and healthy at all times. Writing a robust kubernetes deployment yaml manifest requires combining multiple nested nested fields that configure container images, environment variables, resource limits, and rolling update strategies. Below is a complete, production-ready Deployment manifest example that illustrates how these nested fields fit together cleanly.
apiVersion: apps/v1
kind: Deployment
metadata:
  name: web-app-deployment
  namespace: production
  labels:
    app.kubernetes.io/name: web-app
    app.kubernetes.io/part-of: frontend-system
spec:
  replicas: 3
  selector:
    matchLabels:
      app.kubernetes.io/name: web-app
  template:
    metadata:
      labels:
        app.kubernetes.io/name: web-app
    spec:
      containers:
      - name: nginx-frontend
        image: nginx:1.25-alpine
        ports:
        - containerPort: 80
          name: http
        resources:
          limits:
            cpu: "500m"
            memory: "512Mi"
          requests:
            cpu: "100m"
            memory: "128Mi"
        livenessProbe:
          httpGet:
            path: /
            port: 80
          initialDelaySeconds: 10
          periodSeconds: 15
        readinessProbe:
          httpGet:
            path: /
            port: 80
          initialDelaySeconds: 5
          periodSeconds: 10
In this example, the replicas field guarantees that three identical container instances are maintained. The template section acts as a blueprint for the pods created by the deployment, complete with its own metadata and a nested containers array. Setting explicit resource requests and limits prevents a single misbehaving application from starving other workloads on the same node, which is a critical best practice for production cluster stability.
Service YAML Example
See also: Kubernetes networking
See also: Kubernetes Ingress
While deployments manage the lifecycle of your application pods, pods themselves are ephemeral and receive dynamic IP addresses whenever they restart or reschedule. A Service resource solves this networking challenge by providing a stable, predictable endpoint and load-balancing traffic across a set of healthy pods. Below is a standard Service configuration file that routes incoming cluster traffic to the web application deployment we defined earlier.
apiVersion: v1
kind: Service
metadata:
  name: web-app-service
  namespace: production
  labels:
    app.kubernetes.io/name: web-app
-app.kubernetes.io/part-of: frontend-system
spec:
  type: ClusterIP
  selector:
    app.kubernetes.io/name: web-app
  ports:
  - name: http
    protocol: TCP
    port: 80
    targetPort: 80
The spec.type field determines how the service is exposed, with ClusterIP making it accessible only within the internal cluster network. The ports array maps the incoming service port (port: 80) directly to the container's listening port (targetPort: 80). By abstracting away individual pod IP addresses, services ensure seamless, resilient communication between microservices.
Labels and Selectors
Labels and selectors form the invisible glue that binds independent Kubernetes objects together into functional systems. Labels are arbitrary key-value pairs attached to objects such as pods, deployments, and services, allowing operators to organize and categorize resources logically. Selectors are query expressions used by controllers and services to identify which objects they should monitor, manage, or route traffic toward. For instance, a Service does not explicitly list the names of individual pods; instead, it uses a label selector to dynamically discover every pod matching app.kubernetes.io/name: web-app. If a pod crashes and a new one spins up, the new pod automatically receives the matching label and is instantly added to the service load-balancing pool without manual reconfiguration. Establishing a consistent, standardized labeling convention across your manifests is vital for observability, network policies, and resource filtering.
Applying and Validating YAML
Managing the lifecycle of your manifests requires mastering specific command-line utilities that interact directly with the cluster control plane. Instead of blindly pushing changes into production, professional engineers follow a disciplined validation workflow to catch syntax errors and unintended configuration drifts beforehand. The following sub-sections outline the essential commands used every day by cluster administrators and developers alike.
kubectl apply -f
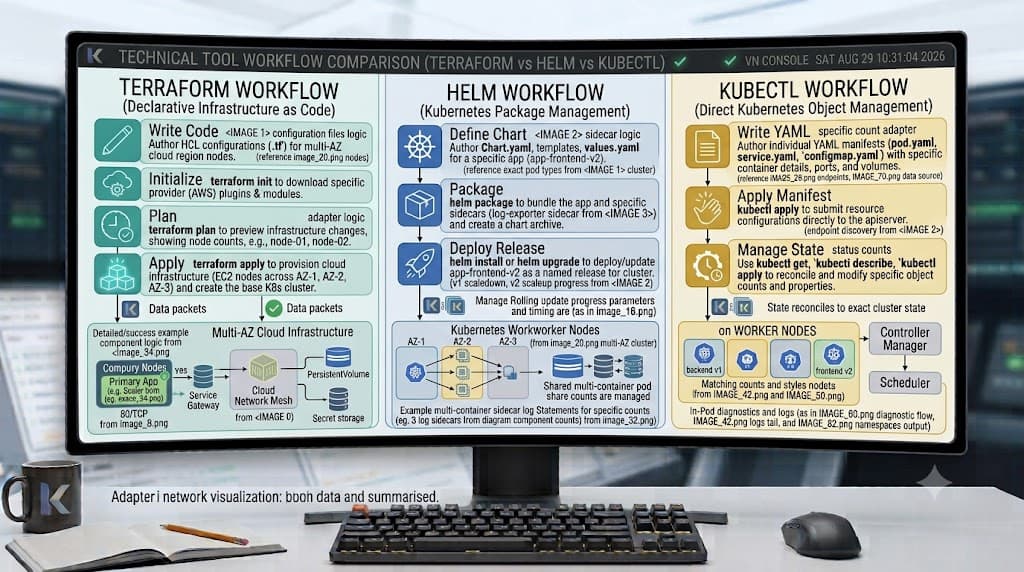
The declarative kubectl apply -f command is the primary mechanism for creating and updating resources within a Kubernetes cluster. When you run this command against a kubernetes manifest file, the client sends the configuration to the API server, which computes a three-way merge between the local file, the live cluster state, and the last-applied configuration stored in object annotations. This approach preserves manual tweaks made by other automation tools while cleanly applying your latest Git-tracked updates. Always prefer declarative application over imperative commands like kubectl create or kubectl run to maintain a reliable audit trail of infrastructure changes.
kubectl diff -f
Before pushing modifications to a live production cluster, running kubectl diff -f is an indispensable safety precaution. This command compares your local YAML configuration against the live object state currently stored in the cluster, outputting a clear unified diff highlighting exactly what additions, modifications, or deletions will occur. By reviewing this output prior to execution, you can catch accidental misconfigurations, incorrect replica counts, or unintended environment variable overrides before they impact active user traffic.
kubectl get -f
Once your configuration files have been submitted, kubectl get -f allows you to inspect the current runtime status of the resources defined in a specific manifest file. By combining this command with output formatters like -o yaml or -o json, you can examine the live state managed by the cluster, verify that status conditions are healthy, and confirm that all metadata fields were correctly interpreted by the API server.
kubectl describe
When a newly applied resource fails to start or gets stuck in a pending state, kubectl describe provides deep diagnostic insights into the object's health. Unlike kubectl get, which provides a brief summary, describe queries the API server for the full object description, including a chronological event log. This event log explicitly surfaces critical warnings, such as image pull failures, insufficient node CPU resources, failed liveness probes, or persistent volume mounting errors, drastically accelerating root-cause analysis.
Common YAML Mistakes
Even experienced developers frequently encounter subtle pitfalls when authoring complex Kubernetes configurations. Being aware of these common failure modes helps you prevent outages and streamline your deployment pipelines.
One of the most frequent errors involves incorrect YAML indentation. YAML syntax strictly relies on spaces rather than tabs for maintaining hierarchical nesting. Mixing tabs and spaces or using inconsistent indentation depths will cause the parser to fail immediately when you attempt validation.
Another critical risk is utilizing obsolete or deprecated API versions. Kubernetes actively deprecates older API groups as features mature—for example, shifting resources from extensions/v1beta1 to apps/v1. Submitting a manifest with an outdated apiVersion to a modern cluster results in validation rejection. Always consult official cluster version documentation to ensure your apiVersion fields remain current.
Finally, omitting required resource requests and limits in your container specifications can lead to severe cluster instability. Without explicit bounds, a single runaway container can consume all available node memory, triggering the Linux OOM killer and evicting neighboring pods. Enforcing strict resource quotas and validation checks in your CI/CD pipelines eliminates these risks before code ever reaches production.
📌 Recommended Next Guides & References
  <li>
    <a href="/article/docker-and-kubernetes-how-they-work-together-2" class="text-primary hover:underline font-semibold flex items-center gap-2">
      <span>→</span> <span>Docker and Kubernetes: How They Work Together</span>
    </a>
  </li>

  <li>
    <a href="/article/kubernetes-ingress-controller-explained" class="text-primary hover:underline font-semibold flex items-center gap-2">
      <span>→</span> <span>Kubernetes Ingress Controller Explained: Architecture, Routing, and Implementation</span>
    </a>
  </li>

  <li>
    <a href="/article/kubernetes-environment-variables-complete-guide-2" class="text-primary hover:underline font-semibold flex items-center gap-2">
      <span>→</span> <span>Kubernetes Environment Variables: Complete Guide to ConfigMaps, Secrets, and YAML Examples</span>
    </a>
  </li>